Feeds:
Posts
Comments

Finally, I have decided to be creative in the kitchen without doing more baking. But you can certainly tell what I like to eat and therefore what I like to cook. One of the biggest challenges that I have cooking for The Critic and I is that he doesn’t like gravy, and I do. This means that I can’t braise chicken or make pork chops with a mushroom sauce. This makes me very sad indeed. However, he asked me to be a bit adventurous (in the kitchen) and jazz up our usual roasted chicken breasts with mashed potatoes. So I did!

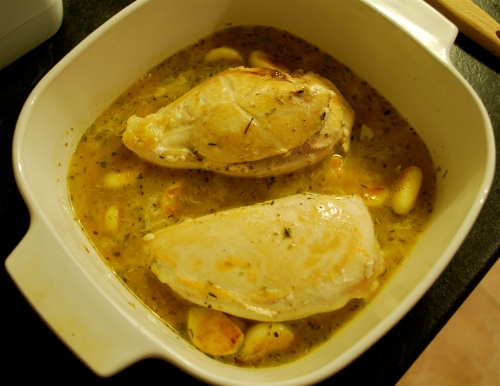
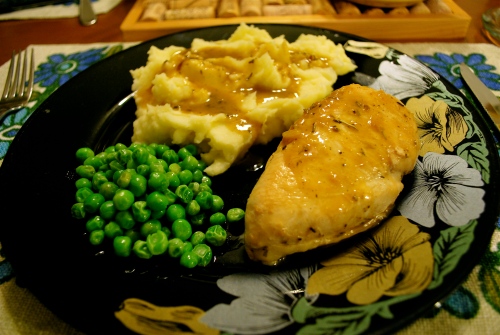
I decided to do my take on the classic Chicken with 40 Cloves of Garlic – paring it down to a perfect meal for 2. I used 2 chicken breasts instead of a whole chicken and about a third of the classic amount of garlic. This meal turned out to be a perfect combination of chicken the way The Critic likes it, plus a sauce that I was able to use as gravy for my mashed potatoes! Enjoy!

DSC_0070

Roasted Garlic Chicken

1 tbsp oil

2 boneless, skinless chicken breasts

1 head garlic, peeled but not crushed

½ cup white wine

½ cup chicken broth

¼ tsp thyme

¼ tsp sage

¼ tsp salt

¼ tsp rosemary

¼ tsp black pepper

DSC_0063

In a large frypan, heat oil over medium-high heat. Add chicken breasts and cook until browned on all sides. Place chicken in an oven-proof casserole dish.

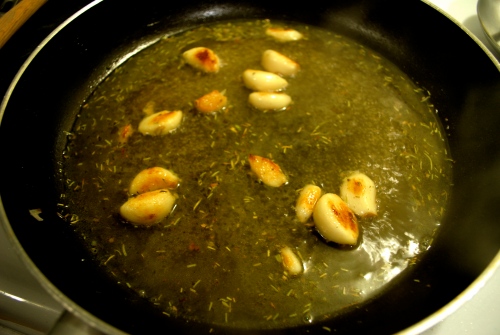
Add garlic to the pan and cook until all sides are browned. Add wine, chicken broth and herbs. Bring to a boil. Pour over chicken.

Cover chicken and liquid and cook in a 375°F oven for 25 – 30 minutes or until chicken registers 180°F on a meat thermometer.

When chicken is cooked, pour cooking liquid into a frypan. Crush garlic and bring gravy to a boil and reduce to about half. Serve gravy over chicken and mashed potatoes.
DSC_0065

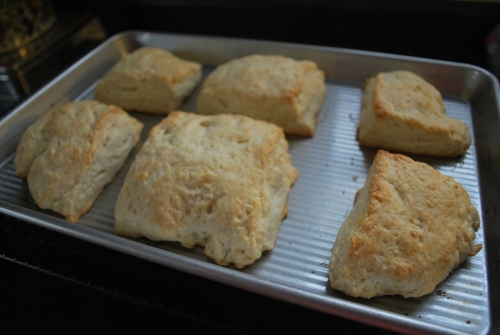
This weekend I was at my local farmers market where I bought some lovely homemade jams from the cutest little girl. Her parents must own the stall, but they have given her the responsibility of selling the jams and jellies. Every time I walked up to take a look at them she was right there ready to sell them to me. I picked out a peach jam (The Critic’s fav) and I asked her favourite was. She told me the raspberry jam, but I had my eye on the strawberry pineapple jam instead. As I walked home with my bounty, I thought about what I want to make to serve these preserved delicacies on. And it hit me – a Basic Tea Biscuit! Immediately when I got home, I framed out a recipe that would do the trick. And what a treat they were for The Critic and I on a quiet Saturday morning. Life is Sweet!

DSC_0043

Basic Tea Biscuits

2 cups flour

1 tbsp baking powder

¼ tsp salt

2 tbsp sugar

½ cup cubed butter, chilled

¾ cup milk

Milk

DSC_0025DSC_0035DSC_0030

Combine flour, baking powder, salt and sugar in a large bowl. Cut in butter with 2 knives until a coarse crumb texture is formed. Add milk and stir with a fork to form a dough.

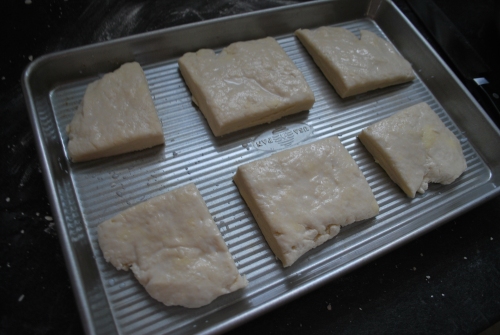
Knead dough on a lightly floured surface until the dough comes together. Shape into a rectangle about 1 inch thick. Cut into 6 biscuits.

Place biscuits on a baking sheet and brush tops with milk. Bake in a 375°F oven for about 30 minutes or until bottoms are golden brown. Let cool on pan. Serve warm or at room temperature.

DSC_0037

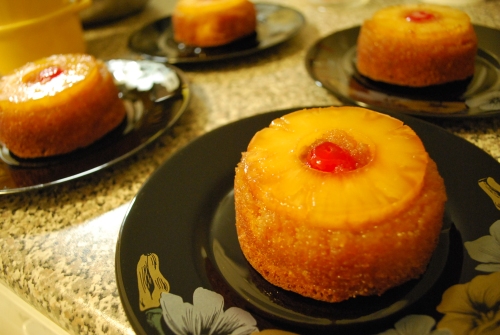
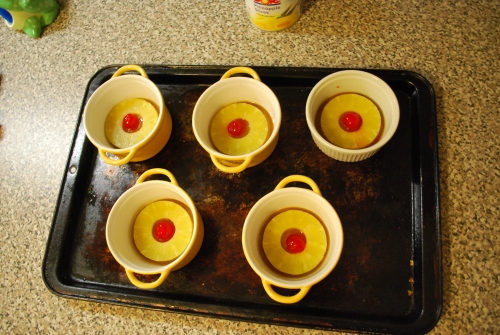
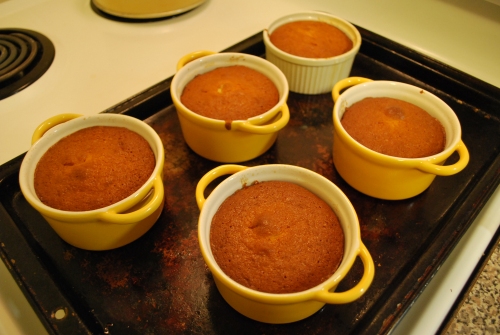
This recipe is a modern twist on an old classic. Today making individual anything is cool and trendy. It is a fun way to serve dessert or a main course. I decided to give it a try, but I wanted a cool presentation to go along with it – so I decided to do an Individual Pineapple Upside Down Cake. It is just as easy to make as the full version, put the pineapple rings in each custard cup with a bit of syrup, and a maraschino cherry in the centre, and fill with batter! This dessert is a great way to end a nice meal with friends or family. Enjoy!

DSC_0109

Individual Pineapple Upside Down Cake

¼ cup butter

½ cup brown sugar

1 can pineapple rings, juice reserved

5 – 7 maraschino cherries

1 cup flour

¾ cup sugar

1 tsp baking powder

¼ tsp baking soda

¼ tsp salt

1/3 cup butter, softened

2 eggs

1 tsp vanilla

1/3 cup pineapple juice

DSC_0095

Grease 5 – 7 8 oz custard cups.

In a small saucepan, melt ¼ cup butter. Add brown sugar and cook, stirring, over low heat until sugar is dissolved and mixture is a caramel colour.

Add about 2 tsp of caramel mixture to the bottom of each custard cup. Place a pineapple ring in each cup and maraschino cherry in the centre of each. Set aside.

In a bowl, whisk together eggs, half of the pineapple juice and vanilla. Set aside.

In a large bowl, mix together flour, sugar, baking powder, baking soda and salt. Using medium speed of an electric mixer, beat in softened butter and remaining pineapple juice. Beat together until flour is moistened then increase the speed to high and beat for 90 seconds until a stiff batter is formed.

Add 1/3 of the egg mixture beating for 20 seconds after each addition. Evenly divide the batter between the custard cups.

Bake in a 350°F oven for 20 – 25 minutes or until a toothpick inserted in the centre comes out clean. Remove the cakes from the oven and use a small spatula to detach the cakes from the sides of the custard cups.

Let cool for 2 – 3 minutes before removing from the custard cups. Invert serving dishes over each custard cup and remove. Scrape any remaining caramel onto the cakes. Serve warm or at room temperature.

DSC_0106

Ready to Eat

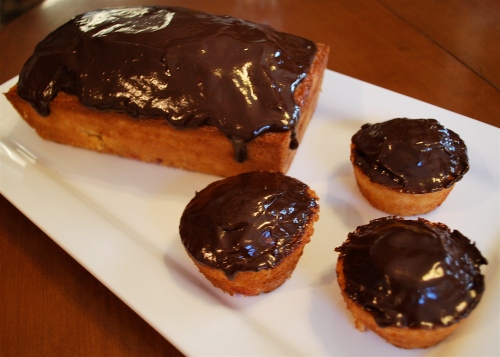
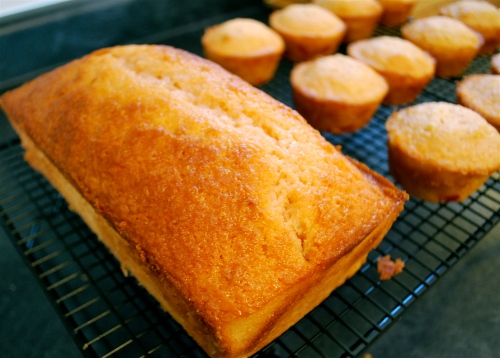
So, the big day is here! Did you buy your sweetie chocolates or flowers? After the past week of candy making, I decided to make The Critic and I a nice Valentine’s day cake! I wanted to incorporate a couple of things that remind me of Valentine’s day for this cake. So I decided on a cake that used champagne and maraschino cherries – hoping for a light, airy texture and pretty pink batter. And I think I got pretty close, the batter is quite liquidy, so the cherries are all at the bottom of the cake and even with adding more of the syrup from the maraschino cherries the baked cake is no longer pink. So my advice to you: put a couple more tablespoons of syrup into the recipe if you want the cake to be pinker and don’t mix the cherries into the batter, but rather sprinkle them over the batter once it’s in the baking dish. I wanted a loaf shaped cake, so I used my small loaf pan (9 x 5 inch) and had enough batter left over to make cupcakes for our friends and coworkers. But if you want only one loaf shaped cake use a larger loaf pan than I did. This recipe would also work well as a layer cake, or do all cupcakes because they turned out great as well – just lower the baking time to about 25 minutes. Happy Valentine’s Day!

Cherry Champagne Cake with Chocolate Ganache Glaze

3 cups flour

1 ½ tsp baking powder

1 tsp baking soda

½ tsp salt

¾ cup softened butter

2 cups sugar

3 eggs

3 egg whites

1 tsp vanilla

2 cups champagne or sparkling wine

2 tbsp maraschino cherry syrup

½ cup chopped maraschino cherries

1/3 cup whipping cream

4 oz semi-sweet chocolate, finely chopped

2 tbsp champagne or sparkling wine

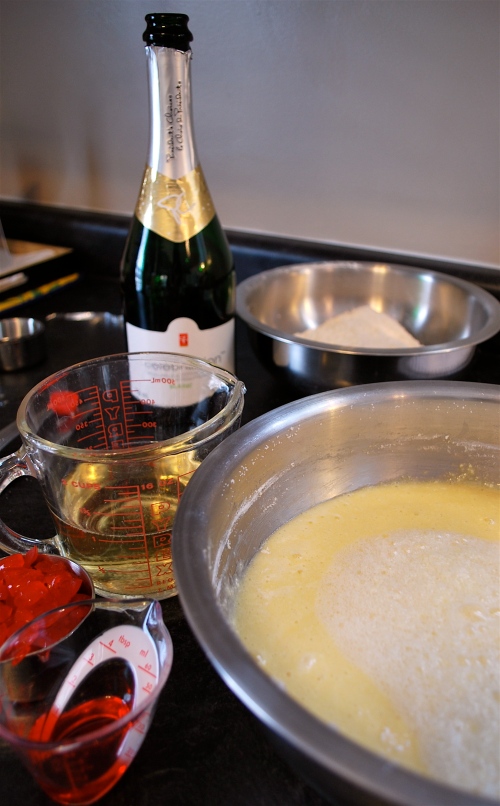
Ingredients set to go

Line the short sides and bottom of a 9 x 5 inch loaf pan with parchment paper. Grease and flour parchment and long sides of pan.

Combine flour, baking powder, baking soda and salt in a bowl. Set aside.

Using medium speed of an electric mixer beat together butter and sugar until fluffy. Add eggs and vanilla to butter mixture. Beat for 2 minutes until light and slightly foamy.

Add flour mixture alternatively with champagne, starting and ending with flour mixture, stirring well after each addition. Add cherry syrup, mix well.

Pour batter into prepared pan, sprinkle cherries over entire top of cake. Bake in a 350°F oven for 55 – 60 minutes or until a toothpick inserted in centre comes out clean.

Set on a wire rack for 10 minutes, remove from pan and cool completely on a rack.

To make the chocolate ganache glaze, bring cream to a boil in a small saucepan. Remove from heat and add chocolate. Stir until chocolate has melted. Cover and let stand 10 minutes.

Stir gently until completely smooth. Stir in champagne. Allow to cool to 85 – 95°F for a pourable glaze.

Pour glaze on top of cake and allow to cool. Enjoy!

Baked

The last and most difficult candy that I have tried to make (and will recommend you try to) is Saltwater Taffy. Now, as the previous 2 recipes showed, making candy does not need to be difficult. Usually you can just boil sugar and water until a certain temperature and pour it onto a pan and allow to cool until it is a delicious treat, but with Saltwater Taffy, you need to use a bit of muscle and a few more complex ingredients. If you are a taffy lover – it will be worth the effort!

There are a couple of ingredients that not everyone will have in their pantry, but should be easy-enough to find: food-grade glycerin: I found mine at a health food store, essential oil flavouring: this is important so that the flavouring doesn’t evaporate a the high temperature that the candy is cooked to. I found mine at a local kitchen shop in London. I would call around to local foodie places near you. Paste food colouring: choose a colour that seems appropriate for the flavouring that you find – I used orange flavouring, so I found an orange colour food paste.

DSC_0022

Last but not least, as I promised before:

The Stages of Cooked Syrup

Thread – Brittle threads run off spoon and can be stretched with fingers

Pearl – Syrup runs off a metal spoon in pearl drops

Cold Water Test Indicators

Soft Ball – forms a limp, sticky ball that flattens when removed from the cold water

Hard Ball – forms a hard ball that holds its shape when removed from the cold water

Soft Crack – firm strands can be stretched when removed from the cold water

Hard Crack – stiff, firm strands break easily when removed from the cold water

DSC_0027

Saltwater Taffy

1 1/3 cup sugar

2/3 cup corn syrup (preferably white)

½ cup water

2 tbsp cornstarch

2 tsp food-grade glycerin

1 tsp sea salt

2 tbsp butter

½ tsp essential oil flavouring

Paste food colouring

Icing sugar

DSC_0029

In a large saucepan, cook sugar, corn syrup, water, cornstarch, glycerin and salt over medium heat, stirring, just until the sugar dissolves.

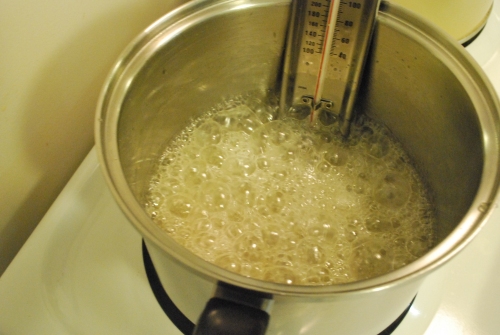
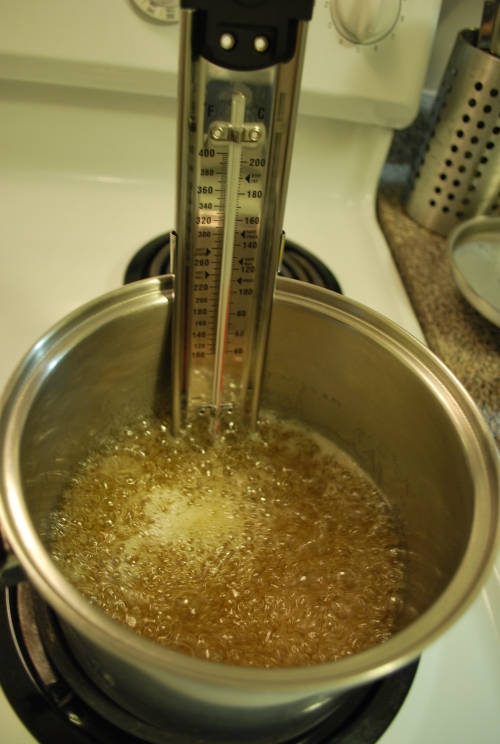
Bring to a boil and cook, without stirring, until a candy thermometer reads 260°F or hard ball stage. This should take about 8 – 10 minutes. Use a pastry brush dipped in hot water to brush down any crystals on the side of the pan.

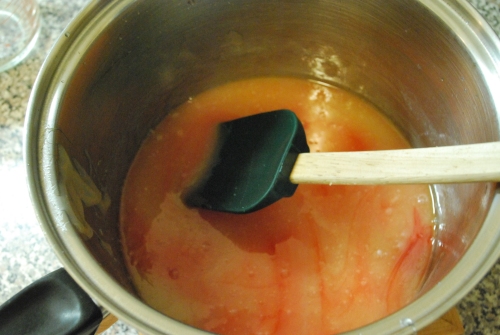
Remove from heat and stir in butter until melted. Stir in flavouring and colour.

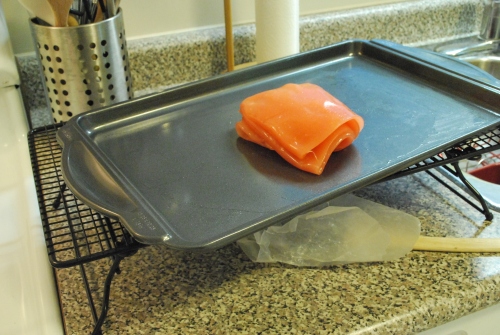
Carefully pour syrup onto a rimmed, nonstick baking sheet. Let cool until it is able to hold an indentation when pressed with a finger. Using a scrapper, fold the taffy over itself, turning and folding until cool enough to handle.

Using buttered hands, pull, fold and twist the taffy until it is very pale, opaque and firm and more difficult to pull, about 15 minutes. The candy will become less sticky the more it is kneaded.

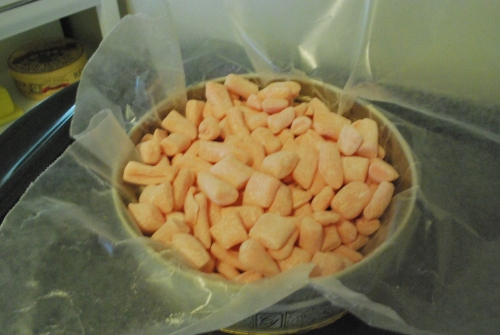
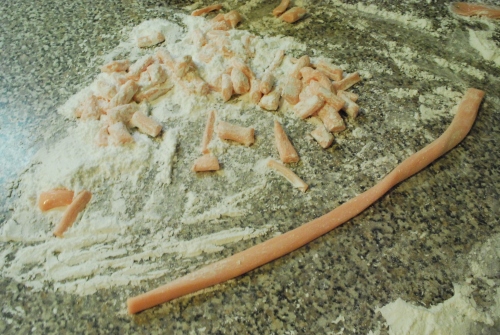
On an icing sugar dusted surface, pull and twist the taffy into a ½ inch thick rope. Using scissors, cut into 2 inch pieces. Wrap each piece with waxed paper, twist ends.

DSC_0032 DSC_0020

DSC_0055The next easiest candy that I recommend you try is a childhood favourite, sponge toffee was always melt in your mouth delicious and crunchy. This recipe is pretty easy to make and will allow you to try another technique of candy making: The Cold Water Test.


The Cold Water Test

A couple of things to note before I get into this: If you decide to use The Cold Water Test, be sure to remove your cooking syrup from the heat, because if it takes you several minutes to complete the test, it is possible that you syrup will over cook while you are doing the test. Use a candy thermometer while you are doing The Cold Water Test – 2 temperature tests are better than 1!

Step 1: Run a clean, metal spoon under hot water to warm. Use spoon to get a small amount of syrup.

Step 2: Drop syrup into a small container of very cold water.

Step 3: Gather the syrup between your fingers and observe it’s behaviour. The hotter the syrup temperature, the higher the concentration of sugar, and therefore the harder the syrup will be when it cools. A limp, sticky ball that flattens when removed from the water indicates the soft ball stage, whereas a hard ball that holds its shape when removed from the water indicated the hard ball stage – more on the stages of cooked syrup next time.

DSC_0031

Sponge Toffee

2 ½ cups sugar

2/3 cup corn syrup (preferably white)

1/3 cup water

4 tsp baking soda

2 tsp vanilla

2 squares semi-sweet chocolate, melted

 DSC_0033

In a large saucepan, cook sugar, corn syrup and water over medium heat, stirring, just until sugar dissolves.

Bring to a boil and cook, without stirring, until the candy thermometer reads 300°F or reaches the hard crack stage. This should take about 15 – 20 minutes. Use a pastry brush dipped in hot water to brush down ant crystals on the side of the saucepan.

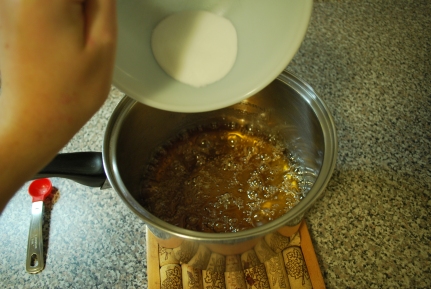
Remove from heat. Using caution, whisk in baking soda; the caramel will bubble and fizz. Whisk in vanilla.

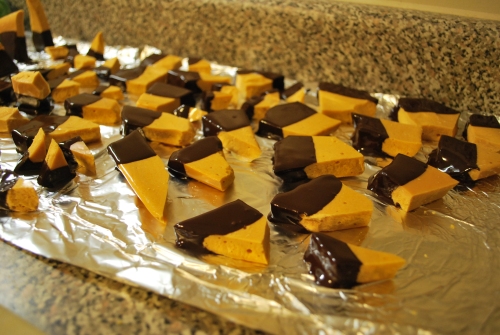
Pour caramel into a greased, foil-lined 13×9 inch baking pan. Allow caramel to cool in pan on a rack for at least 2 hours. Break into pieces and dip in chocolate, if desired (And I know you do).

 DSC_0044

So, one thing that I have been doing for the last six months (other than neglecting this blog) is experimenting with candy making. I have dabbled with it in the past, but I took the big step to commit to trying it out by buying a candy thermometer. This opened so many doors, and I learnt the hard way the first time I used – you need to calibrate that thing, or else your saltwater taffy with turn into hard candies! Either way The Critic’s co-workers still ate it! So just in time for the sweetest holiday of the year (Valentine’s Day) I present a trio of homemade candy! We’ll start with the easiest and work our way to the hardest to make. To do these recipes, I do recommend that you get a candy thermometer, the type with big numbers and clip to hold on to the side of the saucepan is best. But be sure to calibrate it each time you use it, so you know how many degrees to correct for, so you get the right temperature. Why each time you use it, you ask? Altitude and barometric pressure change the boiling point of liquids, so if you make candy on a day with low pressure, the candy will boil at a different temperature than on a day with high pressure – Just do it!


DSC_0125


How to Calibrate a Thermometer:


Immerse thermometer in boiling water, the normal temperature is 212°F. If the reading is 205°F, subtract 7° from the recipe’s indicated temperature, or if it is 215°F, add 3° to the recipe’s indicated temperature. By adding or subtracting the difference in temperature from water boiling you will compensate for the variance in the thermometer.


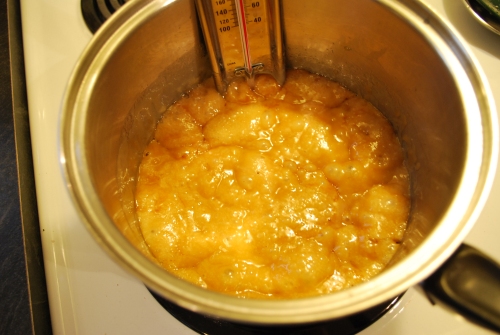
Boiling Syrup


Butter Toffee Crunch

1 cup pecans, toasted and coarsely chopped

1 cup butter

1 cup sugar

3 tbsp water

1 tbsp corn syrup

¾ cup semi-sweet chocolate dipping wafers, melted

Line a 13×9 inch baking pan with foil, extending over the edges of the pan. Sprinkle half of the pecans in a single layer. Set aside.

Melt the butter in a large saucepan over medium heat. Stir in sugar, water and corn syrup. Cook over medium high heat until the mixture comes to a boil. Reduce heat to medium and continue boiling at a moderate, steady rate, stirring frequently, until a candy thermometer reads 290°F, about 15 minutes. Remove saucepan from heat and pour candy onto pecans in prepared pan.

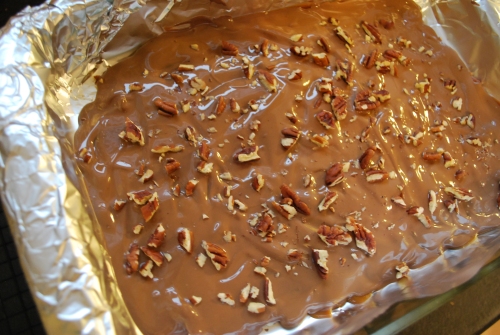
Let the candy stand for 5 – 10 minutes or until firm. Drizzle melted chocolate, spread chocolate to all corners of the pan to completely cover the candy.

Sprinkle with remaining pecans and allow to cool completely. Once the candy is firm, use the foil as an aid and lifer the candy out of the pan and break into pieces.

DSC_0135

Ready to EatOne of the greatest part about this blog is that it’s name worked so beautifully into where The Critic and I lived. At the end of November, this was disrupted and we moved to a new city – Sarnia, Ontario. It is just down the 402 highway from London, but we are no longer living on Waterloo St, so I am no longer Cooking for Two on Waterloo. But I am Cooking for 2 At Two-Twenty Two. The number of the house that we moved into fit in beautifully with my “Cooking for…” title. So here we are at Two-Twenty Two and I am still cooking for the 2 of us and still sharing the recipes I make!
As I said, we moved to Sarnia at the end of November, I am lucky enough to have found a job here, so that started right away after the move, and with traveling to Alberta for Christmas, I have been busy! Finally I have some time off and can post some recipes that I have made since the last time I posted. Plus I also plan to update my Quilt Project as I have actually finished it!

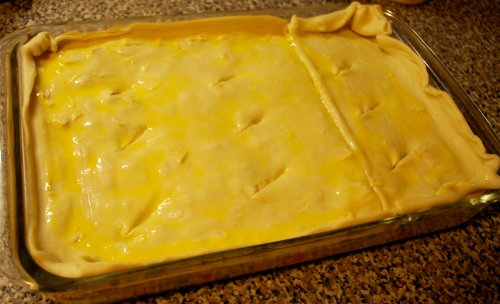
For now, I will leave you with a recipe that I made for a final dinner with friends in London just before we moved. Chicken Pot Pie – I have always wanted to make one, to cut corners I bought a cooked rotisserie chicken from the grocery store, as well as frozen puff pastry. But it was delicious and is a great meal for a cold winter night if  you have some leftover chicken!

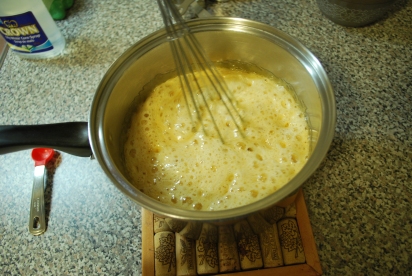
Making the Roux

Chicken Pot Pie

1/2 cup butter

1/2 cup flour

2 cups chicken broth

1 1/2 cups milk

4 – 5 cups cooked chicken, cubed or shredded

1 tsp lemon juice

1/4 tsp salt

1/2 tsp pepper

2 pinches ground nutmeg

2 tbsp butter

1 cup chopped onion

3 carrots, peeled and cubed

3/4 cup frozen peas, thawed

1/2 pkg frozen puff pastry, thawed

1 egg, beaten

Adding the Milk

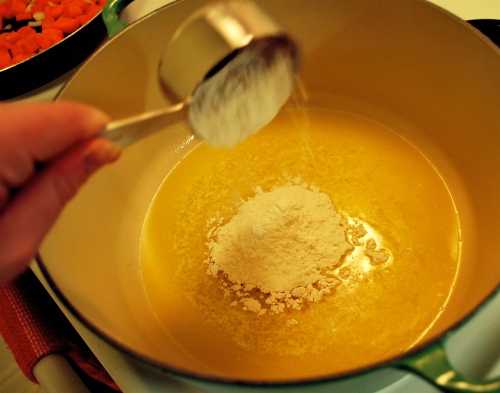
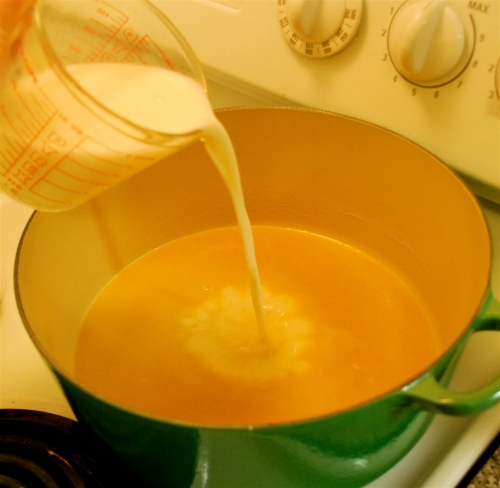
In a Dutch oven, melt 1/2 cup butter over medium heat. Whisk in flour and cook for 1 minute until smooth. Remove from pan and add chicken broth and whisk until smooth. Add milk and return pan to medium heat. Whisk constantly and bring to a simmer, cook for 1 minute. Stir in cooked chicken. Cook, stirring, until chicken is heat, about 2 minutes. Remove from heat and stir in lemon juice, salt, pepper and nutmeg.

In a large frypan, melt 2 tbsp butter over medium-high heat. Add onion, carrots and peas, cook until just tender, about 7 minutes. Add vegetables to chicken mixture.

Pour chicken and vegetable mixture into a greased 9×13 inch baking dish. Unroll thawed puff pastry and place on top of chicken mixture, tucking the edges in against the side of the dish.

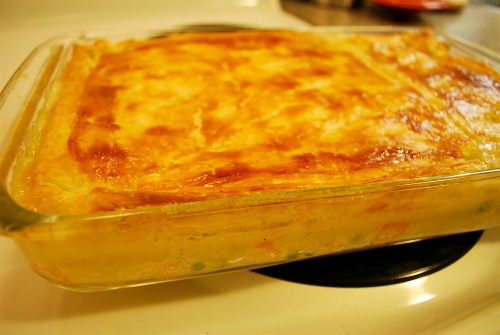
Brush the top of the pastry with beaten egg. Cut several slits in the top of the pastry to allow the steam to vent out. Bake for 30 – 35 minutes or until the chicken mixture is bubbling and the pastry is browned.

Ready for the Oven

Wow! Fall is well under way here in London! We had a nice progressive trend towards cool and just in the last week or two it has gotten down right cold. But I can’t complain when the leaves on the trees are turning and the streets are lined with beautiful fall colours! I have been busy working pretty well full time hours, which is great, but it takes away the time that I would otherwise use for cooking up something delicious! With The Critic working evenings and myself sometimes working evenings as well, several days can go by when dinner just isn’t cooked at our house! But I am still making him meals when I can and freezing them so he always has something to eat while at work. Besides, it keeps him from telling me that I am not holding up my part of the relationship – making food!

I find that most of my spare time these days is spent working on my quilt, it is getting really close to be being finished and I am looking forward to cuddling up with it on the couch!

Because of all the other things that I am focused on these days, I need quick and easy dinners. This pad thai is a great stir fry, and I used a locally made sauce from Rootham Gourmet Preserves, so I didn’t need to do much more than slice of vegetables and cook it up!

Easy Pad Thai

1 tbsp oil

½ onion, thinly sliced

1 bell pepper, thinly sliced

1 cup slivered snow peas

½ lb frozen shrimp, thawed

200 g rice noodles

4 cups boiling water

2 tbsp rice vinegar

½ cup thai dipping sauce

¼ cup chopped peanuts

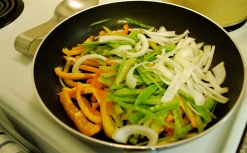
Heat oil in a large frypan or wok over medium-high heat. Add onion and cook for 2 minutes, until softened. Add pepper and snow peas.

Cook, stirring, for 3 minutes, until vegetables are softened. Add shrimp and cook just until turning opaque.

Meanwhile, in a bowl, soak noodles in boiling water for 5 minutes or until tender. Drain.

In a small bowl, combine rice vinegar and pad thai sauce. Add to vegetable mixture. Cook for 1 minute or until shrimp is cooked. Add drained noodles and peanuts to vegetable mixture. Stir until noodles are coated with sauce. Serve immediately.

It seems like whenever I get a craving for cookies, I either grab for The Critic’s favourite, Chocolate Chip Cookie recipe or I find a new one to try, that inevitably contains ginger of some sort. These are not an exception to that rule. I think that this need for ginger cookies came from my Dad, because I remember growing up and him always buying gingersnaps, or making suggestions that my Mom or I should make some ginger cookies. Well, I’m finally doing it!

My problem with a lot of ginger cookies, is that they are indeed ginger snaps – me? I like a chewy, soft cookie full of flavour. But – not too much molasses, because then I find the cookie not gingery enough! These Sugar and Spice Ginger Cookies strike the perfect balance for me. As the name gives away, these is more than just ginger as a spice, there is cinnamon, cloves, nutmeg and ginger. But what makes them ginger cookies for sure is that I stirred some chopped crystallized ginger into the dough – my favourite!

This recipe will be great when Christmas comes around, because one batch makes a ton of cookies! So it will be good for a cookie exchange or just having in your freezer when unexpected company stops by for a visit! For now – who needs an excuse to bake up a batch of super tasty Sugar and Spice Ginger Cookies?!

Sugar and Spice Ginger Cookies

2 ½ cups all purpose flour

2 cups whole wheat flour

2 tsp baking soda

4 tsp cinnamon

2 tsp ginger

1 tsp cloves

1 tsp nutmeg

½ tsp salt

2 cups brown sugar

½ cup melted butter

2/3 cup molasses

2 eggs

1 ½ cups chopped crystallized ginger

Coarse raw sugar

Line 2 rimmed baking sheets with parchment paper.

Combine the first 8 ingredients (flour to salt) in a medium bowl. Set aside.

Using medium speed of an electric mixer, beat together brown sugar, melted butter and molasses, about 5 minutes. Add the eggs one at a time on low speed until mixture is light brown.

Using a wooden spoon, add the dry ingredients to the molasses mixture, mix until the flour is nearly moistened. Stir in the crystallized ginger and mix just until combined.

Roll the dough into 1 inch balls and flatten between your fingers. Drop into the raw sugar and coat both flat sides. Place on prepared pan,

Bake in a 350°F oven for 12 – 13 minutes or until tops are crackled, but cookie is still soft inside. Cool on the pan for 5 minutes. Transfer onto a rack to cool completely. Make about 5 dozen.